Wednesday, July 13, 2016

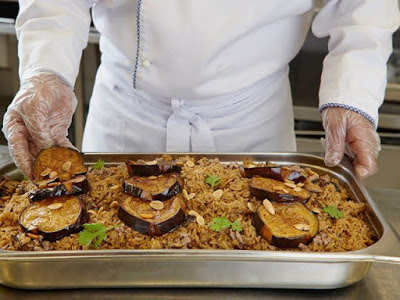
Chicken Eggplant Maklouba Recipe

Chicken Eggplant Maklouba

Yield: 10 servings

Ingredients

1.00 kg Chicken, whole
1.00 kg Basmati rice
40.00 g Knorr Chicken Bouillon Powder
500.00 g Eggplant
200.00 g Onions, chopped
20.00 g Cinnamon powder
10.00 g Coriander powder
15.00 g Turmeric powder
100.00 g Almonds, roasted
100.00 g Roasted Pine nuts
40.00 ml Knorr Chicken Liquid Concentrate Bouillon

Preparation

1. Boil chicken in water for 50 minutes or until it becomes tender. Remove skin and bones and flake into thick flakes.

2. Deep fry eggplant slices until they become golden in colour. Set aside.

3. Heat the ghee in a pot and sauté chopped onions then add minced meat for 5 minutes or until it becomes brown in colour and well cooked.

4. Arrange fried eggplant slices on top of cooked meat in the same pot then add a layer of shredded chicken and flakes, finally add the rice on top.

5. Dissolve Knorr Chicken Bouillon Powder in 2 litre of hot water with all spices and add the stock to the rice and bring to boil. Cover and let it simmer on low heat for 30 minutes or until rice is cooked.

6. Before serving mix trough Knorr Concentrated Chicken Bouillon.

Source: Unilever Food Solutions

Monday, July 11, 2016

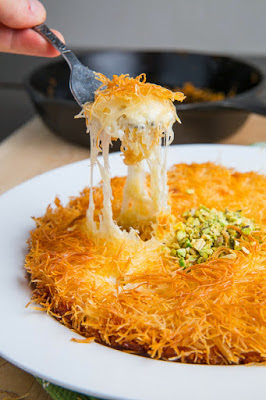
Kanafeh/Künefe (Sweet Cheese Pastry) Recipe

Kanafeh/Künefe (Sweet Cheese Pastry)

Prep Time: 10 minutes Cook Time: 25 minutes Total Time: 35 minutes Servings: 12

A pastry consisting of hot cheese in between layers crispy shredded phyllo dough in a sweet syrup that is common in the Middle East.

Ingredients

1/2 pound shredded phyllo (called: kataifi or kunefe), thawed as directed on package
1/2 cup unsalted butter, melted
2 cups mozzarella, shredded
2 cups feta (soaked in water for an hour) or goat cheese, crumbled
1/2 cup simple syrup or 1/4 cup apple and/or pear sauce

Directions

  1. Break the pastry apart into one or two inch long pieces, separating the strands. (A few pulses of a food process helps with this.)
  2. Mix the butter into the pastry with your hands in a large bowl until coated and press half of it into the bottom of a greased metal baking pan in a thin layer.
  3. Pulse the cheeses in a food processor until the mixture reaches the consistency of a coarse meal and press it into the dough in the pan.
  4. Press the remaining dough onto the cheese and bake in a preheated 350F/180C oven until lightly golden brown, about 20-30 minutes.
  5. Serve warm covered in syrup or topped with apple and/or pear sauce.
Note: Top make the simple syrup, simmer 1/2 cup water and 1/2 cup sugar until the sugar has disolved and let cool.

Nutrition Facts:
Calories 280, Fat 18g (Saturated 11g, Trans 0.3g), Cholesterol 57mg, Sodium 489mg, Carbs 20g (Fiber 0.3g, Sugars 9g), Protein 9g

Source: Closet Cooking

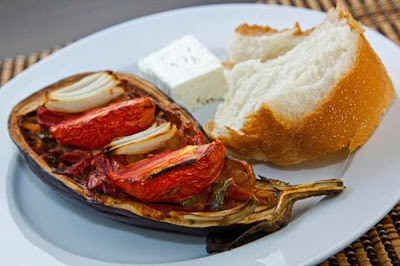
Imam Baildi Recipe

Imam Baildi
Imam Baildi

Servings: 4

Ingredients

2 eggplants
2 tablespoons olive oil
2 onions (sliced)
4 cloves garlic (chopped)
4 tomatoes (peeled and diced)
1 green pepper (seeded and sliced)
1 teaspoon oregano
salt and pepper to taste
1 handful parsley (chopped)
2 tomatoes (sliced)
1/2 onion (sliced)

Directions

  1. Slice the eggplants in half lengthwise, scoop out the middles and chop them.
  2. Salt the eggplant shells and chopped middles and let rest in a strainer for 203-30 minutes.
  3. Roast the eggplant shells in a preheated 400F/200C oven until tender, about 15-20 minutes.
  4. Rinse the salt from the eggplant and pat dry.
  5. Heat the oil in a pan.
  6. Add the onions and saute until the onions are tender, about 7-10 minutes.
  7. Add the garlic and saute until fragrant, about 1 minute.
  8. Add the chopped eggplant, tomatoes, green pepper, oregano, salt and pepper and cook until the sauce thickens, about 25 minutes.
  9. Remove the sauce from the burner and stir in the parsley.
  10. Place the eggplant shells in a baking dish, fill them with the mixture and top with the sliced tomatoes and onions.
  11. Fill the dish with hot water until it goes halfway up the eggplant shells.
  12. Bake in a preheated 400F/200C oven until the water has evaporated and the tomatoes and onions are well roasted and caramelized, about 1 hour.
Source: Closet Cooking

Sunday, July 3, 2016

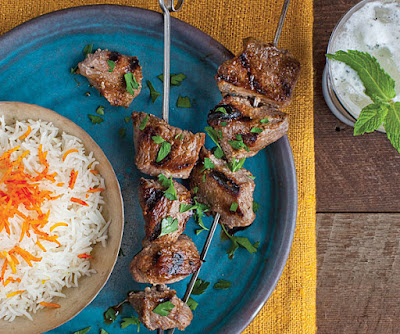
Lamb Kebabs in Pomegranate-Walnut Marinade (Kebab-e Torsh) Recipe

Lamb Kebabs in Pomegranate-Walnut Marinade (Kebab-e Torsh)

Serves 6

This sweet-and-sour kebab is from Gilan Province in northern Iran, where people like their food extra tart. Before grilling, brush off the extra marinade, because it can burn and leave charred flakes on the meat. You can also make these kebabs using beef sirloin, fish, chicken, or vegetables. Start the recipe the day before you plan to serve it so that the kebabs can marinate overnight.

Ingredients

2 lbs. lamb tenderloin or boneless shank or neck, cut into 1-1/2-inch chunks
1 cup walnuts
3/4 cup pomegranate molasses
2 cloves garlic, crushed
2 Tbs. grapeseed oil
1 cup loosely packed fresh flat-leaf parsley, plus extra chopped for garnish
Sea salt and freshly ground black pepper

Directions

Place the meat in a large casserole dish. In a food processor, grind the walnuts, pomegranate molasses, garlic, and olive oil into a puree. Add the parsley and pulse into small bits. Pour the marinade over the meat and toss well. Cover and refrigerate overnight.

If using wooden or bamboo skewers, soak them in salty water for a couple of hours before grilling. Thread 3 or 4 pieces of meat onto each skewer 1/4 inch apart, leaving 2 inches of space at the end. Discard the marinade. Brush or wipe extra marinade from the skewers. Leave the meat out while you heat the grill so it can come up to room temperature (no more than 45 minutes total).

Prepare a hot grill.

Lightly oil the grill and grill the kebabs for 6 to 8 minutes, turning occasionally. When done, the meat should be slightly charred on the outside and very pink on the inside. Transfer to a serving platter and season with salt and pepper. Garnish with parsley and serve.

Source: Fine Cooking

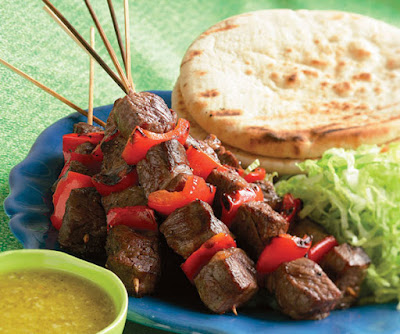
Grilled Steak Kebab Pitas with Ginger & Garlic Dressing Recipe

Grilled Steak Kebab Pitas with Ginger & Garlic Dressing

Serves 4 as a main course, 6-8 as a “small plate.”

Add some Mediterranean flair to tonight's grilled steak. These kebabs are simple yet flavorful; the ginger and garlic dressing drizzled over the meat and vegetables adds plenty of zing to the finished dish. The bamboo skewers need to soak for 20 minutes before assembling the kebabs, so keep that in mind before you start.

Ingredients

1/2 cup extra-virgin olive oil; more for brushing
1 Tbs. finely grated ginger
1 Tbs. green Tabasco or other jalapeño hot sauce
2 tsp. cider vinegar
1 small to medium clove garlic, finely grated or minced
Kosher salt and freshly ground black pepper
1-1/2 to 1-3/4 lb. 1-inch-thick boneless beef strip steaks (2 to 3 steaks), trimmed and cut into 1-inch cubes
6 to 8 bamboo skewers (at least 8 inches long), soaked in water for at least 20 minutes
1 large red bell pepper, cored and cut into 1-1/4- to 1-1/2- inch squares
6 to 8 pita breads, preferably pocketless
2 cups shredded lettuce, preferably a crisp variety like iceberg or romaine

Directions

In a 1-cup liquid measuring cup, whisk the 1/2 cup oil with the ginger, Tabasco, vinegar, garlic, 1/4 tsp. kosher salt, and 1/4 tsp. pepper.

Thread four cubes of meat onto each skewer, inserting a red pepper square between the cubes. (You may not need all the skewers.) Brush the kebabs with oil and sprinkle lightly with salt and pepper.

Just before grilling, lightly oil the grill grates. Set the kebabs on the grill and cook, with the lid closed, turning every 2 min., 4 to 6 min. total for medium rare. Warm the pitas on the grill.

To serve, slide each kebab off its skewer into a pita. Top each with some of the lettuce. Whisk the dressing to recombine and drizzle over the meat and vegetables.
Serving Suggestions

Pair the Grilled Steak Kebab Pitas with this Pasta Salad with Grilled Eggplant and Feta.

nutrition information (per serving):
Size : based on eight servings with eight pitas, Calories (kcal): 400, Fat (kcal): 19, Fat Calories (g): 170, Saturated Fat (g): 4, Protein (g): 20, Monounsaturated Fat (g): 12, Carbohydrates (mg): 35, Polyunsaturated Fat (mg): 2, Sodium (g): 540, Cholesterol (g): 35, Fiber (g): 2,

Source: Fine Cooking
Photo: Scott Phillips

Grilled Lamb Kebab Salad with Cucumber, Tomatoes & Pita Recipe

Grilled Lamb Kebab Salad with Cucumber, Tomatoes & Pita

Serves 4 as a main course

Main-dish salads are summer's answer to the one-bowl weeknight meal. They're super easy to put together, and in this case, the lamb salad is light but complete. It's also a great alternative for those nights when you want a juicy, meaty salad, but need a break from beef.

Ingredients

6 Tbs. fresh lemon juice
2 large cloves garlic, mashed or crushed through a garlic press
1-1/4 tsp. ground allspice
3/4 tsp. kosher salt; more as needed
3/4 tsp. freshly ground black pepper
1/2 cup plus 2 Tbs. extra-virgin olive oil
2 lb. boneless lamb leg or shoulder meat, trimmed well and cut into 1-1/2-inch cubes (to yield about 1-1/2 to 1-3/4 lb.)
1 small head romaine lettuce, washed, dried, and torn or cut into large bite-size pieces (about 6 cups)
1 large cucumber, peeled, seeded, and cut into large dice
2 tomatoes, cut into large dice
1 cup packed mint leaves (from about 21/2 to 3 oz. mint sprigs), roughly chopped
2 pita breads, 5 to 6 inches in diameter

Directions

Heat a gas grill to medium. In a small bowl, whisk the lemon juice, garlic, allspice, salt, and pepper. Whisking constantly, drizzle in 1/2 cup of the oil. Toss the lamb pieces in a medium bowl with 2 Tbs. of the vinaigrette. Thread the lamb onto three or four metal skewers; sprinkle with salt.

Combine the lettuce, cucumber, tomatoes, and all but about 2 Tbs. of the mint in a large bowl. Using a knife, split the pitas and pull the sides apart. Brush the pita halves with the remaining 2 Tbs. oil. Grill until crisp and charred in places, 30 to 60 seconds per side, and transfer to a plate.

Grill the lamb, turning the skewers every 90 seconds or so, until cooked to medium, 6 to 8 min. Remove from the grill and let the lamb rest for 5 minutes. Meanwhile, rip the pitas into large bite-size pieces, add to the bowl with the vegetables, and toss. Slide the lamb off the skewers and cut each cube in half. In a medium bowl, toss the lamb with 3 Tbs. of the vinaigrette (whisk to recombine first).

Toss the vegetables with the remaining dressing and season to taste with salt and pepper. Portion the vegetables onto four plates. Top the salads with the lamb and sprinkle with the remaining mint. Serve immediately.
Serving Suggestions

Toast some extra pitas and serve with Garlic-Yogurt Sauce.

nutrition information (per serving):
Size : based on four servings, Calories (kcal): 657, Fat (kcal): 44, Fat Calories (g): 397, Saturated Fat (g): 8, Protein (g): 38, Monounsaturated Fat (g): 30, Carbohydrates (mg): 29, Polyunsaturated Fat (mg): 4, Sodium (g): 471, Cholesterol (g): 100, Fiber (g): 6,

Source: Fine Cooking
Photo: Scott Phillips

Thursday, June 23, 2016

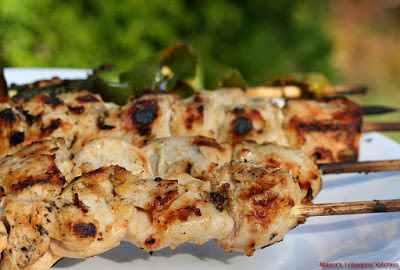
Lebanese Shish Tawook Chicken Kabob Recipe

Lebanese Shish Tawook Chicken Kabob

Try our Chicken Shish Tawook Recipe, an Easy Way to Make Delicious Middle Eastern Chicken Kabobs.

Ingredients

2 lbs of skinless boneless chicken breast, cut into cubes/Kabab chunks
1 cup of freshly squeezed lemon juice
a small slice of lemon with the peel (optional, don't put too much)
15 cloves of garlic, crushed
6 table spoons of plain yogurt (Greek yogurt)
6 table spoons of olive oil
2 table spoons of red vinegar (apple cider vinegar)
1.5 to 2 teaspoons of ground white pepper
⅓ teaspoon of ground ginger spice
½ teaspoon of ground thyme, or ground oregano
⅓ teaspoon of paprika
1+ teaspoon of salt (or to taste)
½ to 1 teaspoon of tomato paste
Lebanese Garlic Paste (see our recipe here) to be served with shish tawook

Instructions

  1. Mix all ingredients well together while rubbing the chicken
  2. Place in a container, cover, and let rest/marinate in the fridge for at least 4 hours
  3. Skewer the chicken right before grilling
  4. Grill on medium heat for 12-18 minutes maximum
  5. As soon as you remove them from the grill, place them in a big warm pot, replace the lid tightly, and let rest for 8-10 minutes - this helps the chicken become more moist (this step is optional)
  6. Spread 1 teaspoon of our garlic paste along the diameter of a pita bread, add some salted cucumber pickles, french fries, grilled tomatoes or peppers (optional), the grilled chicken shish tawook, roll as in a burrito and enjoy. You could also toast the sandwich roll through a panini grill for 2-3 minutes.
Author: Esperance Sammour
Source: mamaslebanesekitchen.com

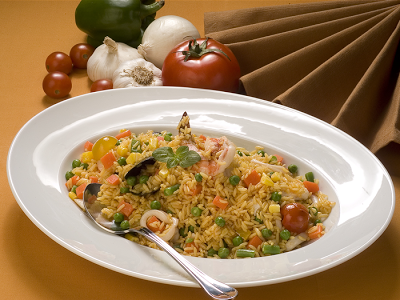
Rice with sea food and vegetables recipe

aRice with sea food and vegetables
Rice with sea food and vegetables

Enjoy the unique taste combination of seafood and vegetables!

Preparation Time: 15 minutes approximately
Cooking Time: 45 minutes approximately
Serves: 4 persons

All you need

200 g fish fillet
12 pcs. shrimps
10 pcs. mussels & calamari
50 g al alali Garden Peas, drained
50 g al alali Cut Green Beans,drained
1/2 cup Extra olive oil
50 g carrot cubed
45 g al alali Sweet Corn
1/2 pcs. red capsicum small cubes
1/2 pcs. Yellow capsicum small cubes
1/4 cup black olives pitted
1/4 onion finely chopped
2 cloves of garlic finely chopped
1/2 cup al alali Tomato Paste
5 small tomatoes
3 cups of fish broth
Salt to taste
2 tsp. curcumin
1 tsp. al alali Ground White Pepper
3 g Saffron dissolved in warm water
Corn oil

Directions


  1. Wash and drain rice. Set aside
  2. Peel and clean shrimps and clean mussels well
  3. Cut fish fillet into fingers and calamari into rings
  4. In a pan, fry onion, garlic, red and yellow capsicum on low fire
  5. Add calamari, fish, muscles and shrimps. Mix slowly
  6. Add al alali Tomato Paste, salt, al alali White Pepper and curcumin
  7. Add fish broth and saffron . Cook until broth is boiling
  8. Add rice and mix slowly. Simmer on low fire for 20 minutes
  9. Add al alali Garden Peas and al alali Cut Green Beans. Mix
  10. Simmer for 5 minutes
  11. Serve hot and enjoy
Source: alalali

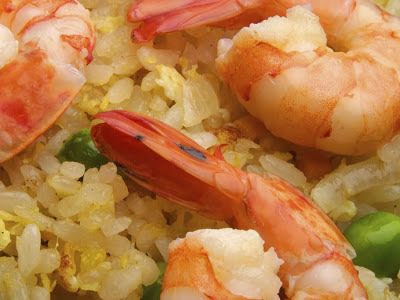
Shrimp machboos recipe

Shrimp machboos
Shrimp machboos

Try the traditional Arabian shrimp machboos that truly lives up to its reputation.

Preparation Time: 20 minutes approximately
Cooking Time: 2 hours approximately
Serves: 8 persons

All you need

Shrimps Cooking

1kg whole shrimps
30g dried coriander
1 clove garlic
al alali Ground Cinnamon
2 cloves
al alali Ground Black Pepper
2 cardamom
1/4 tsp. turmeric
1/4 tsp. baharat spice
2 dried black limes

Stuffing

1/3 cup al alali Cut Green Beans
2 cups al alali Onion Flakes
al alali Tomato Paste
1 green chili pepper
2 tbsps. vegetable oil
2 cloves garlic
1/2 tsp. salt
1 tsp. baharat spice
1 tsp. dried black lime powder

Rice

4 cups basmati rice
4 tbsps. vegetable oil
1 cinnamon stick
2 cloves
al alali Ground Black Pepper
5 saffron threads
1/4 cup rosewater
Salt to taste

Directions

  1. Soak the saffron threads in rosewater until saffron releases its color
  2. In a medium saucepan, add shrimps, add water until shrimps are covered
  3. Boil shrimps and remove the foam that forms at the water surface
  4. Add the remaining ingredients from the list of shrimp cooking. Sprinkle salt and boil for 3 minutes. Drain and keep broth aside
  5. Boil the al alali Cut Green Beans for two minutes, drain and keep broth aside
  6. In a saucepan, roast onions until tender and brown color
  7. Mix the remaining ingredients from the stuffing list with the boiled green beans and the cooked shrimps. Mix well, cook for 10 minutes
  8. Sprinkle the saffron flavoured rosewater on the mix. Cover the saucepan and let it simmer for 5 minutes. Set aside
  9. In the pan, add rice and vegetable oil
  10. Add the saved broths along with some water, boil for 3 minutes
  11. Add cinnamon, al alali Ground Black Pepper and clove to the rice. Cover the pan and simmer for 15 minutes
  12. Remove some rice from the middle, leaving rice at the bottom and sides of the saucepan
  13. Add stuffing along with the shrimps in the centre of the pan
  14. Sprinkle the remaining rosewater over the rice
  15. Cover the pan and heat it on a low flame for 30 minutes
  16. Serve rice with the shrimps on top and enjoy!
Source: alalali

Monday, June 20, 2016

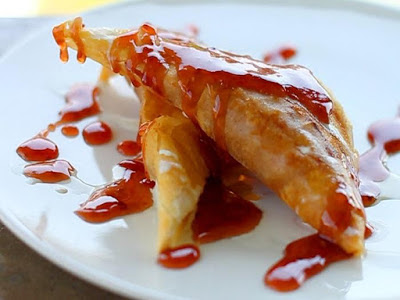
Fruit Pie with Jam Recipe

Fruit Pie with Jam
Fruit Pie with Jam

Fruit tarts are such wonderful treats - you see them in bakeries and in restaurants, and now you can serve them in your own home. Not sure how? All you need to do is follow this recipe by our al alali top chef. Watch how al alali chef prepared it easily!

Preparation Time: 1 hour approximately
Cooking Time: 30 minutes approximately
Serves: 4 persons

All you need

8 pcs pastry sheets
400g pears cut cubes
400g green apple cut cubes
60g butter unsalted
Sugar for filling
2/3 cups al alali Raspberry Preserve for filling
2 cups al alali Raspberry Preserve for sauce
2/3 cup water for sauce
Lemon zest as required for sauce
1/4 cup white flour mixed in water

Directions

  1. In a sauce pan melt butter, then add apple and pears cube. Sauté with little sugar
  2. Add the 2/3 cups of al alali Raspberry Preserve to the sautéed fruits
  3. Add little water to smooth texture, then keep reducing to low heat to cook apple and pears, and become soft. Keep aside to cool
  4. In another sauce pan, mix well the 2 cups of al alali Raspberry Preserve with 150 ml water and lemon zest
  5. Cook on medium heat to reduce for half quantity and become thicker sauce. Allow to cool aside
  6. Spread pastry sheet on flat board, then stuff it with cooked apple and pears sauce. Wrap the sheet in the shape you like
  7. Use flour and water mix to stick the end side sheets to avoid opening while deep frying
  8. Heat oil in deep fryer pan, then fry wraps until golden crisp
  9. Strain well from existing frying oil and cool aside
  10. Cut roll in the middle and top with raspberry sauce prepared before, and scoop of Vanilla Ice cream if available
  11. Serve and enjoy!
Source: alalali

Grilled Kofta with Bechamel Sauce Recipe

Grilled Kofta with Bechamel Sauce

Wondering what to cook for dinner tonight? Don't worry, we've got you covered! Follow the easy step-by-step process on how to whip up a savory meal of Kofta with Béchamel Sauce. This meal is sure to get you some smiles.

Preparation Time: 1 hour approximately
Cooking Time: 30 minutes approximately
Serves: 4 persons

All you need

800 g. minced beef
200 g. fresh parsley finely
300 g. brown onion finely chopped
1 tsp. al alali Garlic Powder
1/3 tsp. al alali Onion Flakes
3 tsp. salt
3/4 tsp. al alali Ground White Pepper
3/4 tsp. al alali Ground Black Pepper
3/4 tsp. al alali Paprika
1/3 cup olive oil
500 gm. potato slice
1 pack al alali Béchamel Sauce

Directions

  • Prepare al alali Béchamel sauce as per directions on packet until become thick texture then keep aside
  • Mix meat, chopped onion, chopped parsley, and all spices together then mold as finger shape
  • Heat oil in frying pan and shallow fry Kofta from outside to become golden
  • Fry potato slices in deep fryer to be cooked
  • In a baking tray, place Kofta and potato behind each other
  • Add al alali Béchamel Sauce on top of all and garnish with parsley.
  • Place in oven for 10 minutes until ready
  • Serve hot and enjoy!
Source: alalali

Sunday, June 19, 2016

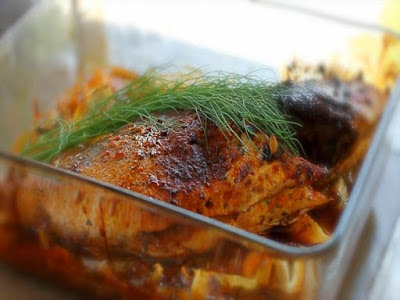
How to make Spicy Baked Fish Recipe

Spicy Baked Fish
Spicy Baked Fish

Simply perfect, perfectly simple! This dish of Baked Fish is not only a delightfully warm and tasty addition to your dinner table, it is also easy to prepare using simple ingredients. Watch its video here, and you'll be able to prepare it easily!

Preparation Time: 1 hour approximately
Cooking Time: 1 hour approximately
Serves: 4 persons

All you need

4 pc 2 kg Sea Bream Fish Ready Clean
3 tbsps. al alali Hot Ketchup
1/2 lemon fresh - chopped
Lemon zest
4 tsps. fresh ginger
3 1/2 tsps. corn oil
3 tsps. salt
3/4 tsp. al alai Garlic Powder
3/4 tsp. al alali Onion Flakes
1/4 tsp. al alali Ground Black Pepper
1/4 tsp. al alali Ground White Pepper
2 brown onions - sliced
2 tbsps.fresh coriander leaves - chopped
1/4 tsp. al alali Parsley Flakes

Directions

  • Heat Oven at 180ْC
  • Prepare marinating sauce by mixing all ingredients without onion & Fish
  • Marinate fish, keep aside for 3 hours in cool fridge
  • In baking tray, add sliced onion, sliced lemon, sprinkle little salt and rest of spices used in marinating fish
  • Place fish on top of onions and bake in oven for 50 minutes
  • When fish is cooked, keep with onions that was in same baking tray and garnish as desired
  • Serve and enjoy!
Source: alalali

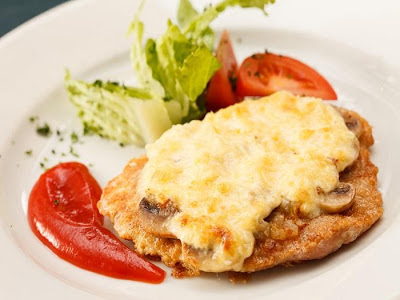
How to make Veal with Vermicelli Recipe

Veal with Vermicelli

Easy and special recipe for cooking veal in a traditional way!

Preparation Time: 30 minutes approximately
Cooking Time: 30 minutes approximately
Serves: 6 persons

All you need

Parmigiana
6 veal cutlets (1/4 inch thick)
1/2 cup grated Parmesan cheese
1/4 cup unseasoned dry breadcrumbs
1/2 tsp al alali Oregano
1/4 tsp al alali Ground Black Pepper
1/4 cup all-purpose flour
2 eggs, slightly beaten
2 to 3 tbsps oil
1 can al alali Pieces & Stems Mushrooms, drained
1 jar al alali Pasta Sauce

Vermicelli
250 gm uncooked al alali Pasta #125
1- 2 tbsps butter
1/4 cup grated Parmesan cheese, if desired
1 cup shredded mozzarella cheese

Directions

  • Place 1 veal cutlet between 2 pieces of plastic wrap or waxed paper
  • Working from center, gently pound cutlet with flat side of meat mallet or rolling pin until about 1/8 inch thick; remove wrap & repeat with remaining cutlets
  • Heat oven to 180°C (350°F)
  • In pie pan or shallow dish, mix 1/2 cup Parmesan cheese, bread crumbs, al alali Oregano & al alali Ground Black Pepper
  • Coat each cutlet with flour; dip in eggs, coat with Parmesan cheese mixture
  • In a large frying pan, heat oil over medium-high, add cutlets; cook for 6 to 7 minutes or until golden brown on both sides
  • Arrange cutlets in ungreased baking dish; add al alali Pieces & Stems Mushrooms
  • Add al alali Pasta sauce over the mushrooms
  • Bake at 350°F or 180°C for 25 to 30 minutes or until bubbly
  • Meanwhile, cook al alali Vermicelli as per directions mentioned on the pack
  • Drain; toss with butter and 1/4 cup Parmesan cheese
  • Remove baking dish from oven; sprinkle veal with mozzarella cheese
  • Serve veal over vermicelli and enjoy!
Source: alalali

Thursday, June 16, 2016

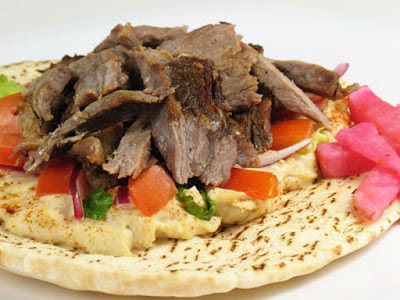
Beef Shawerma Recipe

Beef Shawerma
Beef Shawerma

Beef shawermas are perfect for a quick and tasty meal. Try this simple recipe to prepare the shawerma marinade.

Preparation Time: 8 hours approximately
Cooking Time: 45 minutes approximately
Serves: 4 persons

All you need

For the beef:

500g ground beef, cooked
1 cup yogurt
¼ tsp. al alali Natural Vinegar
2 cloves garlic, crushed
1 tsp. al alali Ground Black Pepper
½ tsp. salt
2 cardamom
1tsp. al alali All Spice
Juice from 1 lemon
2 tbsps. sumac

For the sauce:

1 cup Tahineh sauce
2 cloves garlic, crushed
1 tbsps. yogurt

Directions

  • Mix all ingredients except beef
  • Add little amount of olive oil. (optional)
  • Add beef to the mixture, cover and refrigerate for at least 8 hours, preferably over night
  • In a large sauce pan, cook beef over medium heat for 45 minutes. If beef becomes a little dry add few tbsps. of water
  • For the sauce - mix all ingredients. Set aside
  • Pour sauce on top of the beef
  • Serve with bread, onions, tomatoes and sumac, and enjoy!
Source: alalali

Basbousah with cream recipe

Basbousah with cream

Pamper your family with this traditional Arabic dessert.

Preparation Time: 15 minutes approximately
Cooking Time: 45 minutes approximately
Serves: 4 persons

All you need

1 pack al alali Basbousah Mix

Stuffing
4 cups milk prepared from al alali Full Cream Milk Powder
1/4 cup al alali Corn Starch
1/4 cup al alali Cream Delight prepared from 1 sachet
2 tbsps. orange blossom water

Syrup
1 1/2 cups sugar
1 1/2 cups water
Lemon juice
1 tbsp. orange blossom water
1 tbsp. rose water

Decoration
1/4 cup pistachio
1/4 cup rose jam
1 tbsp. tahineh for greasing the pan

Directions

  • Prepare al alali Basbousah as per directions mentioned on the pack
Cream
  • Boil 3 cups of milk on low fire
  • Mix remaining milk with al alali Corn Starch
  • Add to the hot milk, stirring continuously
  • Add orange blossom water. Set aside until cool
  • Mix with prepared al alali Cream Delight
Syrup
  • Mix sugar and water and boil on low fire
  • Add few drops of lemon juice
  • Boil until thick
  • Add orange blossom water & rose water
Basbousah with Cream
  • Pre-heat oven to 180ºC or 350ºF
  • Grease pan with tahineh
  • Spread half of the prepared Basbousah in the pan
  • Add cream on top
  • Spread the remaining Basbousah over the cream
  • Bake for 20-25 minutes until golden
  • Pour the syrup on top of Basbousah while hot
  • Return to oven for 3 minutes
  • Decorate with pistachio and rose jam
  • Serve cold and enjoy
Source: alalali

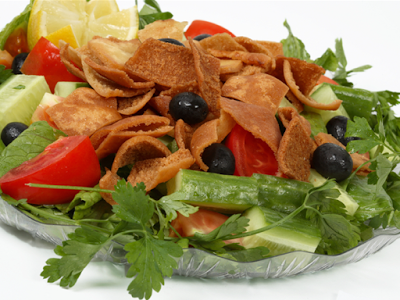
Tuna Fattoush Salad Recipe

Tuna Fattoush Salad
Tuna Fattoush Salad

Try this tasty adaptation of the traditional Middle Eastern Fattoush. Eat this salad soon after making to ensure its crunchiness!

Preparation Time: 15 minutes Approximately
Cooking Time: 3 minutes Approximately
Serves: 4 persons

All you need

4 pita breads
11/2 tbsps. extra virgin olive oil
1 lemon (juice)
5 spring onions, sliced
340g riped tomatoes, chopped
1/2 cucumber, diced
1 can al alali White Meat Tuna in Water (170 g), drained and flaked
2 tbsps coarsely chopped fresh flat-leaf parsley
1 tbsp coarsely chopped fresh coriander
1 tbsp coarsely chopped fresh mint
Salt to taste
al alali Ground Black Pepper to taste

Directions

  • Preheat the grill on high temperature
  • Warm the pita breads for a few seconds, carefully open them
  • Continue to toast the pita for 2–3 minutes on both sides until lightly browned and crisp
  • Break the toasted bread pita into small pieces and set aside
  • Mix olive oil and lemon juice in a large bowl, add salt and al alali Ground Black Pepper to taste
  • Mix spring onions, tomatoes, cucumber and al alali White Meat Tuna in water in a bowl
  • Add the olive oil mixture to the bowl
  • Add parsley, coriander, mint and torn pita pieces to the serving bowl and mix
  • Serve and enjoy!
Source: alalali

Meat Sambousah Recipe

Meat Sambousah
Meat Sambousah

These half-moon shaped fried appetizers are stuffed with a tasty mixture of ground meat and onions.

Preparation Time: 1 hour 20 minutes approximately
Cooking Time: 20 minutes approximately
Serves: 10 persons

All you need

For the dough:

3 cups flour
1/2 tsp.al alali Instant Yeast, dissolved in 2 tablespoons of warm water
3/4 cup warm milk prepared from al alali Full Cream Milk Powder
1/4cup warm water
1/4cup vegetable oil
1tsp. salt

For the filling:

500g ground beef
2 medium onions, grated
2 tbsps. al alali Parsley Flakes
1/4 cup raw pineseeds
3 tbsps. vegetable oil
1tsp. salt
1/2tsps. al alali Ground Black Pepper
4 cups vegetable oil for frying

Directions

To prepare the dough:


  • Mix all the dough ingredients, except the water, together.
  • Slowly pour the warm water, knead all ingredients dough becomes firm
  • Set aside until filling is ready.
To prepare the filling:
  • In a pan, heat the vegetable oil
  • Add ground beef, onions and pine-seeds,add salt and al alali Ground Black Pepper.
  • Mix until meat browns. Set aside
  • Add parsley to the meat mixture and mix
  • On a lightly floured surface, roll the dough flat using a rolling pin.
  • Use an 8cm diameter circular pastry cutter to cut the dough into circles
  • Put 2 teaspoons of filling on top of the dough, fold to cover the stuffing
  • Use your fingers to make tight overlapping folds and to give the sambousah its traditional shape and design
  • In a large pot, heat the vegetable oil and deep fry the sambousah until golden
  • Remove and place them paper towels to absorb excess oil
  • Serve hot or at room temperature and enjoy
Source: alalali

Tuesday, May 17, 2016

Top 10 Famous & Deadly Sword

     Top 10 Famous & Deadly Sword

10.  Tomoyuki Yamashita’s Sword

Tomoyuki Yamashita was a general of the Japanese Imperial Army during World War II.  He became known during the war after conquering the British colonies of Malaya and Singapore, ultimately earning the nickname “The Tiger of Malaya.”  After the end of World War II, Yamashita was tried for war crimes relating to the Manila Massacre and many other atrocities in the Philippines and Singapore.  It was a controversial trial that ended with a death sentence for Tomoyuki Yamashita.  The case changed the United States rules in regards to command responsibility for war crimes, creating a law known as the Yamashita Standard.

YamashitasSword

About the Sword
During his military career, Tomoyuki Yamashita owned a personal sword that contained a blade manufactured by famous sword maker Fujiwara Kanenaga sometime between 1640 and 1680.  The weapon had its handle remade in the early 1900s.  The Samurai sword was surrendered by General Yamashita, along with his army, on September 2, 1945.  It was taken by General MacArthur and given to the West Point Military Museum where it remains today.  The sword is one piece in a great collection of military arms housed at the West Point Museum.

9.  Curved Saber of San Martin

José de San Martín was a famous Argentine general that lived from 1778-1850.  He was the primary leader of the southern part of South America’s struggle for independence from Spain.  San Martín is a South American hero and the 1st Protector of Perú.  Under the lead of San Martín, Peruvian independence was officially declared on July 28, 1821.  In the state of Argentina, the Order of the Liberator General San Martin is the highest decoration given out.


About the Sword
One of the most cherished possessions of José de San Martín was a curved sword that he purchased in London.  San Martín admired the saber’s curved blade and felt that the weapon was maneuverable and ideal for battle.  For this reason, he armed his cavalries of granaderos with similar weapons, which he deemed important for charge attacks.  The curved sword stayed with San Martín until his death and was then passed down to the General de la Republica Argentina, Don Juan Manuel de Rosas.
In his will San Martín referred to the sword as “The saber that has accompanied me throughout the War of Independence of South America.”  In 1896 the weapon was sent to the National Historical Museum in Buenos Aires where it remains today.  In the 1960s the sword was stolen on two separate occasions and this caused museum operators to build a screened gazebo to protect the artifact.

8.  Seven-Branched Sword

The Baekje Dynasty was an ancient kingdom located in southwest Korea.  At its peak in the 4th century, Baekje controlled colonies in China and most of the western Korean Peninsula.  They were one of the Three Kingdoms of Korea, together with Goguryeo and Silla.  In 372, King Geunchogo of Baekje paid tribute to Eastern Jin and it is believed that a Seven-Branched Sword was created and given to the king as a sign of praise.
Seven Branched

About the Sword
The weapon is a 74.9 cm long iron sword with six branch-like protrusions along the central blade, which is 65.5 cm.  The sword was developed for ceremonial purposes and was not built for battle.  In 1870 a Shinto priest named Masatomo Kan discovered two inscriptions on the Seven-Branched Sword.  One of them states “At noon on the sixteenth day of the eleventh month, fourth year of Taiwa era, the sword was made of 100 time’s hardened steel.  Using the sword repels 100 enemy soldiers.  Appropriate for the polite duke king.”
The Seven-Branched Sword contains many statements, but the most controversial involves the phrase “enfeoffed lord,” used when describing the King of Wa as a possible subservient to the Baekje ruler.  The sword is an important historical link and shows that a relationship did exist between the East Asian countries of this era.  The original Seven-Branched Sword is currently housed in the Isonokami Shrine in Nara Prefecture of Japan.  It is not on display to the public.

7.  Wallace Sword

William Wallace was a Scottish knight who lived from 1272-1305.  Wallace is known for leading a resistance against England during the Wars of Scottish Independence, which were waged during the late 13th and early 14th centuries.  During his lifetime, William Wallace was appointed the Guardian of Scotland.  He led an infantry of soldiers who engaged the enemy in hand to hand combat.  The prize possession of many of these soldiers was their sword.  In order to survive on the battlefield one had to be a talented swordsman.  In 1305, William Wallace was captured by King Edward I of England and was executed for treason.  Today William Wallace is remembered in Scotland as a patriot and national hero.  His sword is one of the most famous in the world.
Wallace


About the Sword
The William Wallace sword is located at the National Monument in Stirling, Scotland.  The shaft of the sword measures 4 feet by 4 inches in length (132cm) and it weighs 6.0 lb (2.7 kg).  The sword is said to be the weapon that Wallace used at the Battle of Stirling Bridge in 1297 and the Battle of Falkirk (1298).  The pommel on the sword consists of an onion-shaped piece of gilded iron and the grip is wrapped with dark brown leather.  The hilt or handle that is currently on the Wallace sword is not the original.  It is believed that the sword has been modified on separate occasions.
After the execution of William Wallace, Sir John de Menteith, governor of Dumbarton Castle, received his sword.  In 1505, King James IV of Scotland paid the sum of 26 shillings to have the sword binned with cords of silk.  It is said that the sword underwent many changes, which might have been necessary because Wallace’s original scabbard, hilt and belt were said to have been made from the dried skin of Hugh Cressingham, who was an English commander.

6.  Tizona Sword

El Cid is a man that was born circa 1040 in Vivar, which was a small town about six miles north of Burgos, the capital of Castile.  The Kingdom of Castile was one of the medieval empires of the Iberian Peninsula.  During his lifetime El Cid became a successful military leader and diplomat.  He was named the chief general of the army of Alfonso VI and became a Spanish hero.  El Cid was the king’s most valuable asset in the fight against the Moors.  He was a skilled military strategist and strong swordsman.
Tizona

About the Sword
El Cid owned and used many different swords in his lifetime, but the two most famous are Colada and Tizona.  Tizona is a sword that was used by El Cid to fight against the Moors.  The weapon is one of Spain’s most cherished relics and is believed to have been forged in Córdoba, Spain, although considerable amounts of Damascus steel can be found in its blade.  Damascus steel was primarily used in the Middle East.  Tizona is 103 cm/40.5 inches long and weighs 1.1 kg/2.4 pounds.  It contains two separate inscriptions, with one listing a manufactory date of 1002 and the other quoting the Catholic prayer Ave Maria.  Tizona is currently on display at the Museo de Burgos in Spain.

5.  Napoleon’s Sword

In 1799, Napoleon Bonaparte became the military and political leader of France after staging a coup d’état.  Five years later the French Senate proclaimed him emperor.  In the first decade of the 19th century Napoleon and the French Empire were engaged in conflict and war with every major European power.  Ultimately, a series of victories gave the French a dominant position in continental Europe, but as history would later repeat itself, in 1812 the French began their invasion of Russia.  The decision to invade Russia marked the turning point in the fortune of Napoleon.  In 1814, the Sixth Coalition invaded France and Napoleon was captured and exiled to the island of Elba.  He would escape, but ultimately died in confinement on the island of Saint Helena.  Historians regard Napoleon as a military genius and a man who made strong contributions to the operational art of war.
Napoleon

About the Sword
On the battlefield Napoleon carried a pistol and a sword.  He owned a large collection of arms and artillery.  His weapons were one of a kind and included the best materials.  In the summer of 2007, a gold-encrusted sword that once belonged to Napoleon was auctioned off in France for more than $6.4 million dollars.  The sword was used by Napoleon in battle.  In the early 1800s, Napoleon presented the weapon to his brother as a wedding gift.  The sword was passed down from generation to generation, never leaving the Bonaparte family.  In 1978, the sword was declared a national treasure in France and the winner of the auction was not identified.

4.  Sword of Mercy

The Sword of Mercy is a famous weapon that once belonged to Edward the Confessor.  Edward the Confessor was one of the last Anglo-Saxon kings of England before the Norman Conquest of 1066.  He ruled from 1042 to 1066 and his reign has been characterized by the crumbling disorganization of royal power in England.  Shortly after Edward the Confessor’s death, the Normans began to expand into England, led by the infamous William the Conqueror.
Sword of Mercy

About the Sword
The Sword of Mercy has a broken blade, which is cut off short and square.  In 1236, the weapon was given the name curtana and has since been used for royal ceremonies.  In ancient times it was a privilege to bear this sword before the king.  It was considered a merciful gesture.  The story surrounding the breaking of the weapon is unknown, but mythological history indicates that the tip was broken off by an angel to prevent a wrongful killing.
The Sword of Mercy is part of the Crown Jewels of the United Kingdom and is one of only five swords used during the coronation of the British monarch.  The weapon is rare and is one of only a small number of swords to survive the reign of Oliver Cromwell.  Cromwell is known for ordering the melting down of ancient artifacts for scrap gold and metal.  During the British coronation, the Sword of Mercy is wielded as the monarch bestows knighthood upon the recipient of honor.

3. Zulfiqar Scimitar

Zulfiqar is the ancient sword of the Islamic leader Ali.  Ali was the cousin and son-in-law of the prophet Muhammad.  He ruled over the Islamic Caliphate from 656 to 661.  By some historical accounts, Muhammad gave Zulfiqar to Ali at the Battle of Uhud.  Muhammad admired Ali’s power and strength on the battlefield and wanted to present him with the cherished weapon.  The sword is a symbol of the Islamic faith and is admired by millions of people.
Zulfiqar is a scimitar, which refers to a West Asian or South Asian sword with a curved blade.  It is said that Ali used the sword at the Battle of the Trench, which is a famous siege attempt on the city of Medina.  During the battle, Muhammad, Ali, and other Muslim defenders built trenches to protect Medina against the much larger confederate cavalry.
Zulfiqar

About the Sword
A few conflicting images of the famous scimitar sword exist.  Some of them describe the weapon as having two parallel blades, emphasizing its mystical abilities and speed, while others portray Zulfiqar as a more traditionally-shaped scimitar.  Some historical drawings depict the sword with a split, V-shaped blade.  According to the Twelver Shia, the weapon survives today and is kept in the possession of Imam Muhammad al-Mahdi.  The weapon is part of the famous collection called al-Jafr.
Al-Jafr is a mystical Shia holy book.  It is composed of two skin boxes that contain the most important artifacts from the time of Muhammad and Ali.  The collection has been passed down over the generations, with each new Imam receiving it from his dying predecessor.  The contents of Al-Jafr are quite impressive, but they are not made available for public viewing.  One section of the book describes the Islamic rules, directives and matters surrounding wars, including a bag that contains the armor and weapons of Muhammad.  Zulfiqar is said to sit among the priceless artifacts.

2.  Honjo Masamune

Masamune was a Japanese swordsmith that is widely regarded as one of the world’s greatest metallurgists.  The exact dates for Masamune’s life are unknown, but it is believed that he worked from 1288–1328.  Masamune’s weapons have reached legendary status over the centuries.  He created swords known as tachi and daggers called tant?.  The swords of Masamune have a strong reputation for superior beauty and quality.  He rarely signed his works, so it can be hard to positively identify all his weapons.
Masamune

About the Sword
The most famous of all Masamune swords is named Honjo Masamune.  The Honjo Masamune is so important because it represented the Shogunate during the Edo period of Japan.  The sword was passed down from one Shogun to another for generations.  In 1939 the weapon was named a national treasure in Japan, but remained in the Kii branch of the Tokugawa family.  The last known owner of Honjo Masamune was Tokugawa Iemasa.  Apparently Tokugawa Iemasa gave the weapon and 14 other swords to a police station in Mejiro, Japan, in December of 1945.
Shortly thereafter in January 1946, the Mejiro police gave the swords to Sgt. Coldy Bimore (U.S. 7th Cavalry).  Since that time, the Honjo Masamune has gone missing and the whereabouts of the sword remains a mystery.  Honjo Masamune is one of the most important historical artifacts to disappear at the end of World War II.

1.  Joyeuse

Charlemagne is a man that was born circa 742.  He is one of the greatest rulers in world history and became King of the Franks in 768.  In 800 he was named Emperor of the Romans, a position that he held for the remainder of his life.  In the Holy Roman Empire he was known as Charles I and was the first Holy Roman Emperor.  During Charlemagne’s lifetime he expanded the Frankish kingdom into an empire, which covered much of Western and Central Europe.  Charlemagne is regarded as the founding father of both the French and German monarchies, as well as the father of Europe.
Joyeuse

About the Sword
Joyeuse is the name of Charlemagne’s personal sword.  Today, there are two swords attributed to Joyeuse.  One is a saber that is kept in the Weltliche Schatzkammer in Vienna, while the other is housed at the Louvre in France.  The blade on display at the Louvre claims to be partially built from Charlemagne’s original sword.  The sword is made of parts from different centuries, so it can be hard to positively identify the weapon as Joyeuse.  The hilt of the sword indicates a manufactory date around the time of Charlemagne.  The heavily sculpted gold pommel is made in two halves and the long gold grip was once decorated with diamonds.
Charlemagne’s sword appears in many legends and historical documents.  Bulfinch’s Mythology described Charlemagne using Joyeuse to behead the Saracen commander Corsuble as well as to knight his friend Ogier the Dane.  After the death of Charlemagne, the sword was said to have been contrarily held by the Saint Denis Basilica and it was later taken to the Louvre after being carried at a Coronation processional for French kings.
Tuesday, February 2, 2016

Feta and lemon stuffed chicken breasts with mash recipe

Feta and lemon stuffed chicken breasts with mash

Baked chicken breasts are made exotic with the use of Persian feta stuffing.

To Prep 0:20
To Cook 0:30
INGREDIENTS 11
DIFFICULTY EASY
SERVINGS 4

Ingredients

1kg desiree potatoes, peeled, chopped
4 x 200g chicken breasts
100g (1/2 cup) Persian (marinated) feta, crumbled
1 lemon, zested
2 tablespoons thyme leaves, plus extra small sprigs, to serve
1 clove garlic, crushed
Salt and pepper, to season
2 tablespoons olive oil
180ml (3/4 cup) pouring cream, warmed
100g butter, chopped
Steamed green beans and lemon wedges (optional), to serve

Method

Step 1
Place potatoes in a saucepan of cold salted water, bring to a simmer, then cook for 15 minutes or until tender and easily crushed with the back of a spoon.

Step 2
Meanwhile, using a sharp knife, make a horizontal incision into chicken the length of each breast to form a pocket (don’t cut all the way through).

Step 3
Preheat oven to 200C. To stuff chicken, place feta, zest, thyme and garlic in a small bowl. Season with salt and pepper, then combine well. Divide stuffing among chicken pockets and spread evenly.

Step 4
Heat oil in a large, ovenproof frying pan over high heat. Cook stuffed chicken for 2 minutes or until golden. Turn over, then cook in oven for a further 12 minutes or until cooked through. Remove pan from oven, turn chicken over, then rest in pan for 5 minutes.

Step 5
Drain potatoes well in a colander and return to pan. Using a potato masher, mash until smooth. Add cream and butter, season, then stir to combine.

Step 6
Cut stuffed chicken in half. Divide mash among plates, then top with chicken. Scatter with extra thyme and serve with green beans and lemon wedges, if using.

MasterChef - May 2012 , Page 38
Recipe by Dominic Smith

Photography by Jeremy Simons

Persian rice salad recipe

Persian rice salad photo
Persian rice salad

To Prep 0:10
To Cook 0:15
INGREDIENTS 8
DIFFICULTY EASY
SERVINGS 4

Ingredients

500g skinless chicken breast fillets, trimmed of any fat
750ml reduced-salt chicken stock
1 cup SunRice Basmati Rice
1/2 cup mint leaves
2 cups mixed salad leaves
10 fresh dates, pitted, roughly chopped
1 teaspoon ground cinnamon
1/4 cup (60ml) lemon juice

Method

Step 1
Bring 1L water to the boil in a pan and add chicken. Return to the boil and poach for 10-12 minutes until cooked through. Leave to cool in the liquid for 5 minutes. Remove and slice thinly.

Step 2
Meanwhile, combine the stock with 1 cup (250ml) water in a saucepan and bring to the boil. Add the rice and simmer over medium-high heat for 10-12 minutes until tender. Drain (if necessary) and fluff with a fork.

Step 3

Combine the chicken, rice, mint, salad leaves and dates in a bowl.

Step 4
Combine cinnamon and lemon juice in a small bowl, add to the rice mixture and toss to coat. Serve warm.

Nutrition

Energy 1700kJ
Fat saturated 1.00g
Fat Total 3.00g
Carbohydrate sugars 18.00g
Carbohydrate Total 59.00g
Dietary Fibre 3.00g
Protein 34.00g
Cholesterol 74.00mg
Sodium 540.66mg

delicious. - September 2005 , Page 159
Recipe by Nancy Duran

Photography by Petrina Tinslay

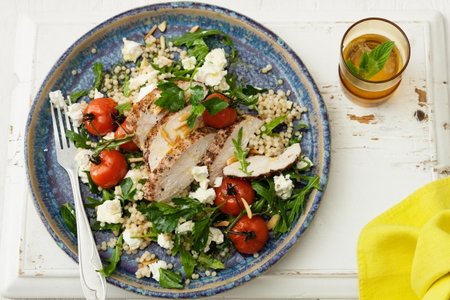
Pepper chicken and pearl couscous salad with Persian feta recipe

Pepper chicken and pearl couscous salad picture
Pepper chicken and pearl couscous salad with Persian feta

This delicious Pepper chicken and pearl couscous salad with smooth feta is sure to become a regular feature on your dinner menu. Proudly brought to you by Lemnos and the Taste team.

To Prep 0:15
To Cook 0:20
INGREDIENTS 12
DIFFICULTY EASY
SERVINGS 4

Ingredients

250g trussed cherry tomatoes
4 (about 150g each) chicken breast fillets
1/2 teaspoon coarsely ground black pepper
1 teaspoon sumac
1 tablespoon olive oil
1 1/2 cups (300g) pearl couscous
100g baby rocket leaves
1/2 cup flat-leaf parsley leaves
1/2 cup mint leaves
250g Lemnos Smooth Feta, crumbled, reserving 2 tbs of oil
1 tablespoon cider vinegar
1/4 cup (35g) toasted slivered almonds

Method

Step 1
Preheat oven to 200°C. Line a baking tray with baking paper. Place the tomatoes on the tray and drizzle with half the oil. Season with salt and pepper. Roast for 10 minutes or until tomato begin to wilt. Remove from heat.

Step 2
Heat a chargrill pan on high. Combine the chicken, pepper, sumac and remaining oil in a large bowl. Season with salt. Cook on grill, turning, for 10 minutes or until just cooked through. Transfer to a plate. Cover with foil. Set aside for 5 minutes to rest. Thickly slice.

Step 3
Cook the couscous in a saucepan of boiling water for 8 minutes or until tender. Rinse under cold running water. Drain well.

Step 4
Combine the couscous, tomatoes, rocket, parsley, mint, feta in a large bowl. Whisk the reserved oil and vinegar in small bowl. Drizzle over couscous mixture. Divide among serving plates. Top with chicken and sprinkle with almonds to serve.

Taste.com.au - September 2014
Recipe by Sarah Hobbs

Photography by Craig Wall

Monday, February 1, 2016

Persian rice baked with chicken, kumara and broccolini recipe

Persian rice baked with chicken picture
Persian rice baked with chicken, kumara and broccolini

To Prep 0:15
To Cook 0:40
INGREDIENTS 19
DIFFICULTY EASY
SERVINGS 4

Ingredients

1 tbs olive oil
6 (about 600g) chicken thigh fillets, cut into 2cm pieces
1 brown onion, finely chopped
2 tsp finely grated fresh ginger
1 tsp cumin seeds
1 tsp sweet paprika
2 green cardamom pods, crushed
1 cinnamon stick
1 tsp saffron threads
1 1/2 cups (300g) SunRice low GI white rice
1 kumara, peeled, cut into 2cm pieces
2 1/4 cups (560ml) chicken stock
1 tbs pomegranate molasses
1 bunch broccolini, cut into 5cm pieces
1/2 cup (70g) toasted pistachios, coarsely chopped
1/2 cup small mint leaves
Greek-style yoghurt, to serve
Lemon wedges, to serve
Pomegranate molasses, to serve

Method

Step 1
Preheat oven to 180C. Heat the oil in a large casserole pan over high heat. Add half the chicken; cook, turning, for 5 minutes or until brown all over. Transfer to a bowl. Repeat with remaining chicken.

Step 2
Add the onion and ginger; cook, stirring, for 5 minutes or until onion softens. Add the cumin, paprika, cardamom, cinnamon and saffron; cook, stirring, for 1 minute or until fragrant. Return the chicken with the Sunrice low GI white rice and kumara and stir to combine. Pour over chicken stock and add pomegranate; stir to combine. Bring to the boil. Remove from heat.

Step 3
Bake, covered, in preheated oven for 30 minutes or until liquid is absorbed and rice is tender. Arrange broccolini over rice. Bake, covered, for 5 minutes or until broccolini is tender. Set aside for 5 minutes to rest.

Step 4
Use a fork to lightly fluff the rice. Sprinkle with pistachios and mint leaves. Serve immediately with yoghurt and lemon wedges, if desired.

Taste.com.au - June 2014
Recipe by Sarah Hobbs

Photography by Craig Wall

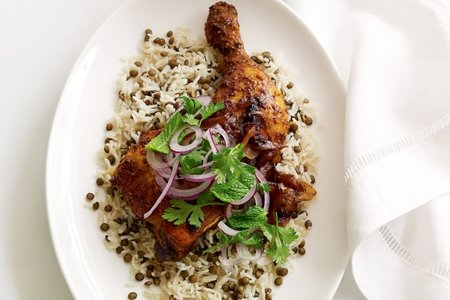
Persian chicken with lentil rice recipe

Persian chicken with lentil rice picture
Persian chicken with lentil rice

To Prep 0:05
To Cook 0:25
INGREDIENTS 16
DIFFICULTY EASY
SERVINGS 4

Ingredients

4 (about 250g each) chicken marylands
1 teaspoon ground turmeric
1 teaspoon ground cumin
1 teaspoon ground paprika
1 teaspoon ground cinnamon
1 tablespoon lemon juice
1 tablespoon olive oil
1/2 cup (100g) puy lentils (or Australian blue lentils)
1 cup (200g) SunRice Basmati Rice, rinsed, drained
1 1/2 cups (375ml) Campbell's Real Stock Chicken
50g butter
1 brown onion, thickly sliced
1 bunch coriander, leaves picked
1 bunch mint, leaves picked
1 red onion, thinly sliced
Lemon wedges, to serve

Method

Step 1
Preheat oven to 200°C. Combine the chicken, turmeric, cumin, paprika, cinnamon, lemon juice and oil in a large bowl and gently toss to combine. Season with salt and pepper. Place in a roasting pan. Roast in preheated oven for 25 minutes or until golden brown and cooked through.

Step 2
Meanwhile, cook the lentils in a saucepan of boiling water for 20 minutes or until tender. Drain well.

Step 3
Combine the rice and stock in a medium saucepan over high heat. Bring to the boil. Reduce heat to low and cook, covered, for 12 minutes or until liquid is absorbed and rice is tender. Remove from heat and set aside, covered, for 5 minutes. Add the lentils and use a fork to stir through.

Step 4
Melt the butter in a large frying pan over medium heat until foaming. Add the onion and cook, stirring, for 8 minutes or until golden.

Step 5
Spoon the rice mixture among serving plates and top with onion mixture. Combine the coriander, mint and red onion in a small bowl. Place the chicken on rice mixture and top with coriander salad. Serve immediately with lemon wedges, if desired.

Nutrition

Energy 2519kJ
Fat saturated 10.00g
Fat Total 24.00g
Carbohydrate sugars 4.00g
Carbohydrate Total 53.00g
Dietary Fibre 6.00g
Protein 40.00g
Cholesterol 156.00mg
Sodium 578.52mg

All nutrition values are per serve.

Notebook: - June 2008 , Page 125
Recipe by Sarah Hobbs

Photography by Chris Chen

Sunday, January 31, 2016

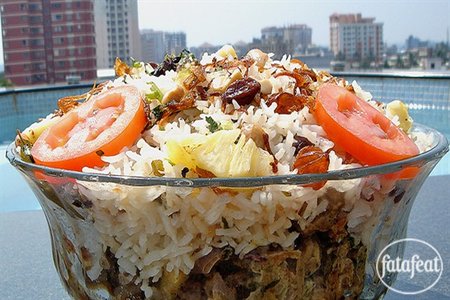
How to make lamb biryani recipe

lamb biryani picture
Lamb Biryani

Preparation time: 30 minutes
Serves: 2
Level: Medium

Ingredients

2 tbsp vegetable oil
2 onion (thinly sliced)
3 garlic cloves
4 cardamom pods
Nutmeg (ground)
1 stick cinnamon (Crushed)
1 tablespoon mixture of garlic with ginger and green chili
¼ teaspoon turmeric
½ teaspoon garam masala powder
curry leaves
½ teaspoon salt
½ teaspoon black pepper
1 tomatoes (chopped)
¼ cup fresh pineapple (chopped)
2 tbsp cashew paste
3 tbsp yogurt
1 tbsp coriander (chopped)
2 tbsp mint
1 teaspoon cumin powder
1 kg lamb (cut)
½ lemon (juice)
2 cups basmati rice

Directions

Rice
Boil the rice with garam masala and curry leaves.

Drain rice

Add fried onions and roasted cashews, raisins and some of the pineapple chunks. Stir the mixture and set aside.

To serve
Place meat in a deep bowl. Add basmati rice. Sprinkle with fried onions, parsley, and chopped coriander. Place some tomato slices on the sides.

Lamb biryani
Heat oil in a saucepan. Add onion, cardamom, nutmeg, cinnamon and ginger mixture. Stir mixture for few seconds.

Add the onion and stir the mixture until the onion wilts

Add the turmeric, masala powder, salt and pepper and stir the mixture well.

Add tomato and pineapple mixture and stir well again for a few seconds.

Add the cashew paste and stir the mixture for one minute on medium heat.

Add the meat (which has already cooked with garam masala) and lemon juice. stir until the meat is completely covered with the mixture.

Sprinkle the mixture with some fried onion, cashews and raisins.

You might also like:

White chocolate baklava cigars recipe

White chocolate baklava cigars picture
White chocolate baklava cigar

All good things must come to a close, but you'll look forward to the end if it means relishing these creamy, slender delights.

To Prep 0:45
To Cook 0:20
INGREDIENTS 9
DIFFICULTY EASY
MAKES 16

Ingredients

105g (3/4 cup) slivered almonds, coarsely chopped
100g white chocolate, coarsely chopped
1 tablespoon caster sugar
12 sheets filo pastry
60g unsalted butter, melted
225g (1 cup) white sugar
125ml (1/2 cup) water
5 cardamom pods, bruised
1 tablespoon fresh lemon juice

Method

Step 1
Place the almonds, chocolate and caster sugar in the bowl of a food processor and process until finely chopped.

Step 2
Preheat oven to 200°C. Line a baking tray with non-stick baking paper. Place the filo on a clean work surface. Cover with a clean tea towel, then a damp tea towel (this will prevent it drying out). Brush 1 filo sheet with melted butter. Top with another filo sheet and brush with melted butter. Repeat with another filo sheet and melted butter. Cut into quarters. Spoon 1 tablespoonful of almond mixture along the centre of 1 narrow edge of each filo stack. Fold in sides and roll up to create a cigar shape. Place, seam-side down, on the lined tray and brush with melted butter. Repeat with remaining filo sheets, almond mixture and melted butter. Bake for 20 minutes or until golden.

Step 3
Meanwhile, place white sugar and water in a small saucepan over low heat. Cook, stirring, for 5 minutes or until the sugar dissolves. Add cardamom pods. Increase heat to high and bring to the boil. Reduce heat to medium and simmer for 5 minutes or until syrup thickens. Stir in the lemon juice.

Step 4
Place cigars in a heatproof dish. Drizzle over the syrup. Serve.

Notes

You can prepare this recipe to the end of step 1 up to 2 hours ahead. Continue from step 2 up to 1 hour ahead.

Nutrition

Energy 822kJ
Fat saturated 4.00g
Fat Total 9.00g
Carbohydrate sugars 19.00g
Carbohydrate Total 25.00g
Dietary Fibre 1.00g
Protein 3.00g
Cholesterol 11.00mg
Sodium 81.11mg

All nutrition values are per serve.

Australian Good Taste - March 2007 , Page 70
Recipe by Alison Roberts

Photography by William Meppem

Chicken, spinach and feta pide recipe

Chicken, spinach and feta pide picture
Chicken, spinach and feta pide

Try this classic Turkish dish of chicken, spinach and feta wrapped in a delicious golden-brown pastry.

To Prep 1:40
To Cook 0:40
INGREDIENTS 20
DIFFICULTY CAPABLE COOKS
MAKES 8

Ingredients

250ml (1 cup) milk
60g butter, chopped
1 1/2 tablespoons caster sugar
125ml (1/2 cup) warm water
2 teaspoons (7g/1 sachet) dried yeast
675g (4 1/2 cups) plain flour
2 teaspoons salt
1 egg yolk
1 tablespoon water
Lemon wedges, to serve

Chicken and spinach filling

1 tablespoon olive oil
1 brown onion, finely chopped
2 garlic cloves, crushed
1kg chicken mince
1 tablespoon tomato paste
1 tablespoon sweet paprika
2 tablespoons dried oregano leaves
400g can diced tomatoes
200g baby spinach leaves
200g Lemnos Full Cream Fetta, crumbled

Method

Step 1
To make the chicken and spinach filling, heat the oil in a large frying pan over medium-high heat. Add the onion and garlic and cook, stirring, for 5 minutes or until onion softens. Add the chicken mince and cook, stirring with a wooden spoon to break up any lumps, for 5 minutes or until mince changes colour. Add the tomato paste, paprika and oregano; cook, stirring, for 1 minute or until aromatic. Add the tomatoes and cook, stirring occasionally, for 10 minutes or until sauce thickens slightly. Remove from heat. Add the spinach and toss until spinach wilts. Taste and season with salt and pepper. Set aside to cool.

Step 2
Meanwhile, to make the dough, combine the milk and butter in small saucepan over low heat. Cook, stirring, for 3 minutes or until butter melts and mixture is lukewarm. Remove from heat.

Step 3
Combine the sugar, water and yeast in a small bowl. Set aside for 3 minutes or until foaming.

Step 4
Combine the milk mixture and yeast mixture in a large bowl. Add the flour and salt and stir to form a dough. Turn onto a lightly floured surface and knead for 10 minutes or until smooth and elastic. Shape into a ball and place in a bowl. Cover with plastic wrap and set aside in a warm, draught-free place for 1 hour or until dough doubles in size.

Step 5
Preheat oven to 200C. Lightly grease 2 baking trays with oil. Use your fist to knock back the dough. Divide into eight even portions. Roll a dough portion out to a 15 x 25cm oval. Place one-eighth of the chicken mixture over the dough, leaving a 2cm boarder. Sprinkle with feta. Combine the egg yolk and water in a small bowl. Brush egg wash around the boarder. Pull dough up and fold over to partially cover the filling. Pleat the edge. Brush with egg wash and place on the lined tray. Repeat with remaining dough, chicken mixture and feta.

Step 6
Bake in preheated oven, swapping trays halfway through cooking, for 20 minutes or until golden brown and cooked through. Serve with lemon wedges.

Nutrition

Energy 3112kJ
Fat saturated 11.20g
Fat Total 24.90g
Carbohydrate sugars 7.80g
Carbohydrate Total 76.20g
Dietary Fibre 5.00g
Protein 51.90g
Cholesterol 179.00mg
Sodium 1158.00mg

All nutrition values are per serve.

Taste.com.au - February 2014

Photography by Craig Wall

Saturday, January 2, 2016

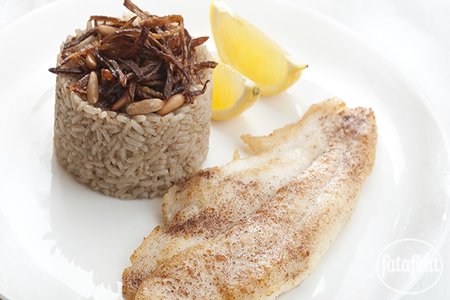
Sayadieh Fish Recipe

Sayadieh Fish
Sayadieh Fish

Preparation time: 20 minutes
ٍServes: 4
Level: Easy

Ingredients

1 tbsp olive oil
1 kg white fish fillets
3 white medium-sized onions, sliced
1/2 cup pine nuts
2 cups long-grain white rice
2 1/2 tsp cumin powder
1 1/2 tsp cinnamon powder
4 cups chicken broth
1 lemon, for garnish
Salt and pepper, to taste

Directions

Heat oil in a non-stick large saucepan. Fry fish fillets on both sides until golden brown. Put fried fish aside.

Add onion and pine nuts to the saucepan, stir on medium heat for 10 minutes or until a little golden brown.

Add rice, cumin powder, Cinnamon powder. Stir ingredients for 1 minute. Add chicken broth and leave it until it begins to boil.

Place fish fillets gently over the rice. Cover the saucepan and cook over low heat for 25 minutes or until rice is done.

Take out the fish fillets gently, place rice in a serving dish then put the fish beside the rice or over it.

Garnish with fried onion, pine nuts and lemon slices.

Source: Lebanese Recipes